 |
| Red Painted Easter eggs |
I used red cabbage (blue), onion skins and turmeric (rusty orange), and cherry juice (brown) to make the three egg colors.*
1. Wash uncooked eggs: Remove any oily residue from eggs by washing them with warm, soapy water. Allow to dry.
2. Select produce: Combine produce and spices to make your favorite colors or experiment with new color combination.
3. Prep for three colors: Cut up one head of red cabbage. Peel skins from three onions and add 3 teaspoons of turmeric. Measure four cups of cherry juice.
4. Boil: Put each color combination into a pot with water (adjust amount to cover materials). Cabbage: approximately 8 cups of water. Onion skins: about 6 cups. Boil each for around 30 minutes. Reduce heat and remove produce. Strain with cheesecloth.
5. Add vinegar: Put strained liquid back into each pot. Add vinegar. (1/4 cup for red cabbage and 3 tablespoons of each: onion skins (orange) and cherry juice (brown). Gently put in eggs and boil for 30 minutes.
6. Soak: Turn off heat and allow the eggs to soak for two to three hours. The time depends on each particular dye. Check often and remove eggs when satisfied with the color. Lay finished eggs on paper towels to dry. When completely dry, put into egg cartons and refrigerate.
7. Add shine: Moisten a cloth with a few drops of vegetable oil. Rub onto eggs to deepen colors and make eggs glossy.
TIP: Ad lib! If you‘re not happy with the color produced for a particular dye batch, it’s OK to add a few drops of food coloring to the pot to coax out a bit more color. *Don’t eat eggs made from this particular recipe as the eggs are cooked too long. Place them in a refrigerator until you can use them as decorations for Easter.

10 Natural egg dye combination from vegetables, fruits and spices
Boil these combination or create your own.
1. Lavender: Make a mixture of purple grape juice, violet blossoms plus 2 teaspoons of lemon juice and Red Zinger tea.
2. Deep purple: Violet blossoms, red wine, red onion skins and hibiscus tea.
3. Blue: Canned blueberries, red cabbage and purple grape juice. (I added a few drops of blue food coloring to boost the blue color of the eggs in the photograph above.)
4. Orange/rust: Mix onion skins and turmeric or cooked carrots, chili powder and paprika to get a deep orange color.
5. Pink: Red beets or juice, cranberries or juice, raspberries and red grape juice.
6. Brown: Coffee grounds, instant coffee, black tea, black walnut shells or cherry juice.
7. Greenish yellow: Yellow Delicious apples.
8. Dark yellow: Many teaspoons of turmeric.
9. Red: Canned or frozen cherries with juice, pomegranate juice, raspberries and many red onion skins.
10. Green: Dark-green, spinach leaves and liquid chlorophyll.
Things to do
MATERIALS NEEDED
Fresh eggs: Choose the number of eggs that you will need plus extras for mistakes.
Produce and Spices: Purchase vegetables, fruits, juices or spices to make a variety of natural dye combinations.
Vinegar: Plain white vinegar is needed to color mixture when dyeing eggs.
Pots, saucepans: Non-porous pots are needed to boil dyeing materials, vinegar and water.
Accents: Put your imagination to work when adding colorful accents to finished eggs. Decorate finished eggs with stickers or crayons. Before dyeing, use crayons to repel dye and draw unique patterns on eggs.
Plastic: Protect your work surfaces from permanent stains and water damage.
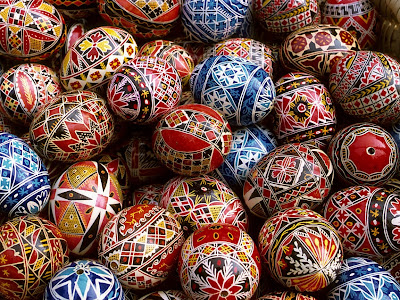
Ukrainian egg designs
Making your own brightly patterned, Ukrainian eggs is no small feat. This popular Eastern European craft has been continued through the ages as a means of bringing good luck and health to the families who make them. The designs and colors are highly detailed and dyed with vibrant colors. The website, www.learnpysanky.com, has clear instructions on how to create the egg designs, as well as familiarizing readers with the legends and traditions behind them. The website also shares classic Ukrainian recipes for paska (the Ukrainian decorated bread made especially at Easter), perogies (potato and cheese dumplings) and borscht (a beautifully red beet soup).
Via


